If you use Gmail and trying to indent and unable to figure it out. You have landed on the right post, I will show you how to indent in Gmail with shortcut keys.
I am an old user of Gmail and whenever I press the “TAB” key while drafting an email in Gmail. It moves to the next item, instead of leaving 5 spaces.
I am sure many of the users will be facing this issue, so I decided to write a quick short step by step tutorial on how to TAB in Gmail while writing or editing an email.
How to Indent in Gmail – Step by Step
Follow these easy steps to provide an indent or Tab in Gmail. It will be done through keyboard shortcuts. I will share the PC version shortcuts and for mac systems.
Step1 – Login to your Gmail account and sign in to your account
- On your computer, go to Gmail and login with your username and password
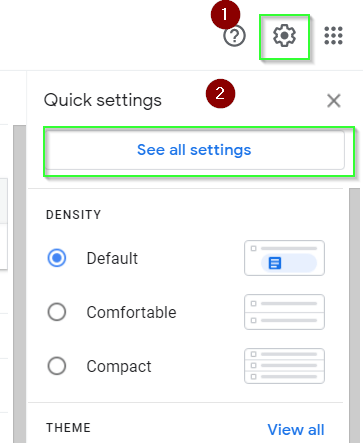
Step2 – Open settings in Gmail
- In the top right, click Settings
See all settings.
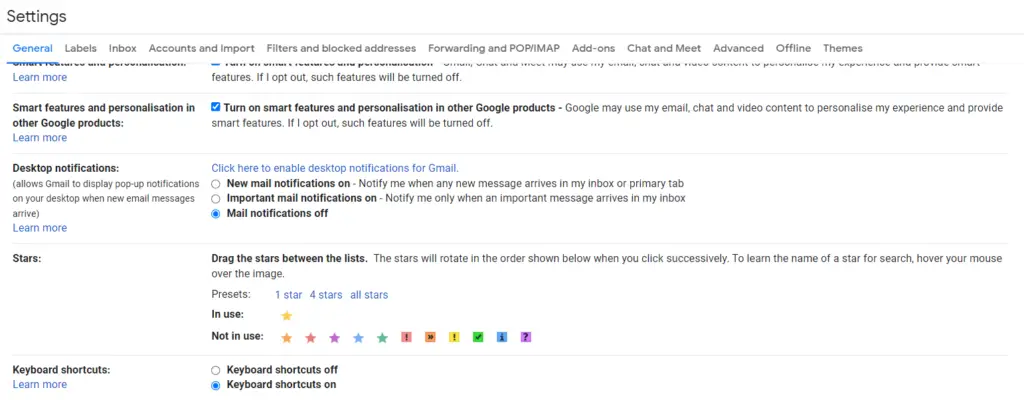
- At the top, choose a settings page, General.
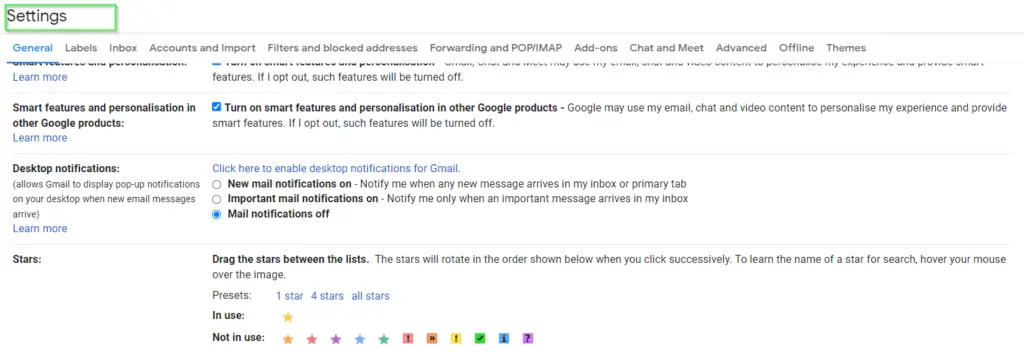
Step3 – Enable Keyboard shortcuts
Scroll down and you will reach to “Keyboard shortcuts” section. By default, Keyboard shortcuts will be off or disabled.
You must select “keyboard shortcuts on” to enable it. Then you will be able to indent in Gmail quickly by pressing hotkeys.
Once you enabled the keyboard shortcuts, scroll down to the bottom of the page and click on “Save changes“.
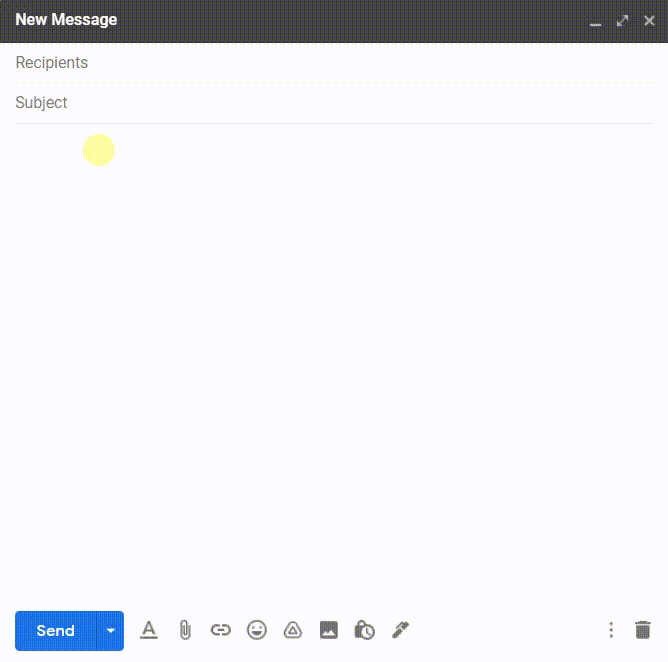
Step4- Compose new Email
Now to test it, Compose a new email message or edit your existing email.
To composes a message –
- At the top left, click
Compose.
- In the “To” field, add recipients. You can also add recipients:
- In the “Cc” and “Bcc” fields.
- When you compose a message, with a “+ sign” or “@mention” and the contact’s name in the text field.
- Add a subject.
- Write your message.

Step5 – Press shortcut keys to indent in your Email
Now press the following keys in your PC to indent or tab in Gmail.
- “CTRL + [” – Press this key combination on your keyboard to indent less or reduce the space
- “CTRL + ]” – To indent more or increase the space
How to indent in Gmail for Mac systems
Press the following keys on your keyboard –
⌘ + [– To indent less or to reduce space in mac, press command ⌘ button and then “[” simultaneously.⌘ + ]– to indent more or alternative to press “TAB” key on your keyboard
Refer to the following “Gif” for further reference.
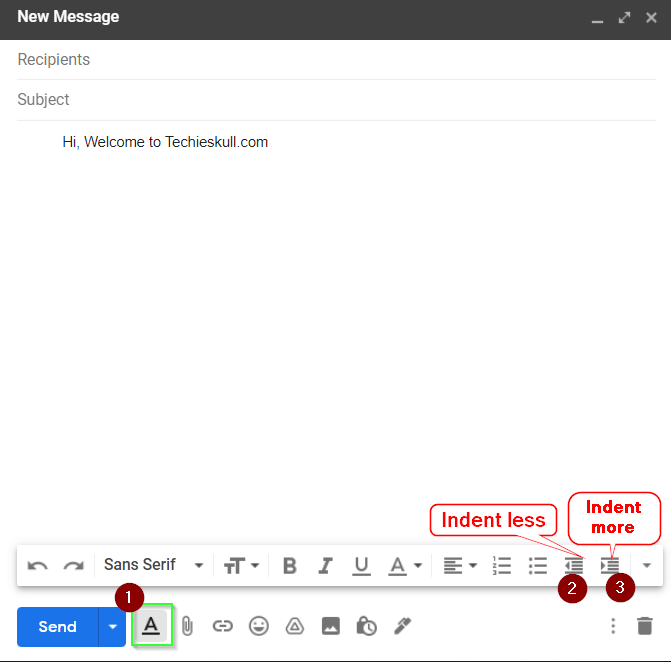
How to indent in Gmail using indent button
Alternatively, you can also use indent button in Gmail. For that you can use following steps –
- During drafting email, Click on formatting button “A“.
- Then select Indent more or Indent less button to format your text.
Congrats!! now you know how to indent in Gmail for your text.
Pro Tip * – To see more shortcut keys on Gmail, press “Shift + ?“.
Make sure you are on the Email dashboard. If you will be drafting an email and trying these keys, it won’t work.
You can also visit this Google link for more shortcuts on Gmail. It will definitely save time if you will learn these tricks.
Above mentioned link contains the following categories of shortcuts –
- Compose & chat
- Formatting text
- Actions
- Hangouts
- Jumping
- Threadlist selection
- Navigation
- Application
How do I indent bullets in Gmail on PC?
To indent bullets in Gmail, following shortcuts will be helpful.
- Use Ctrl for PC or Laptop.
- Use command ⌘ button in case of Mac
| Action | Shortcut |
|---|---|
| Numbered list | ⌘/Ctrl + Shift + 7 |
| Bulleted list | ⌘/Ctrl + Shift + 8 |
Summary
So in nutshell, there are only 5 steps involved as shown in this post, if you want to use a “TAB” key in Gmail or want to indent in your Emails.
I hope you would like this short article on how to indent in Gmail. Let me know your thoughts via comments.